构建触发器
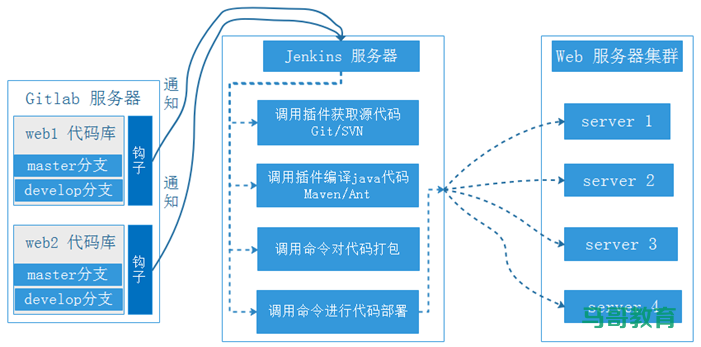
构建触发器(webhook),有的人称为钩子,实际上是一个HTTP回调,其用于在开发人员向gitlab提交代码后能够触发jenkins自动执行代码构建操作。
以下为新建一个开发分支,只有在开发人员向开发(develop)分支提交代码的时候才会触发代码构建,而向主分支提交的代码不会自动构建,需要运维人员手动部署代码到生产环境。
gitlab新建develop分支
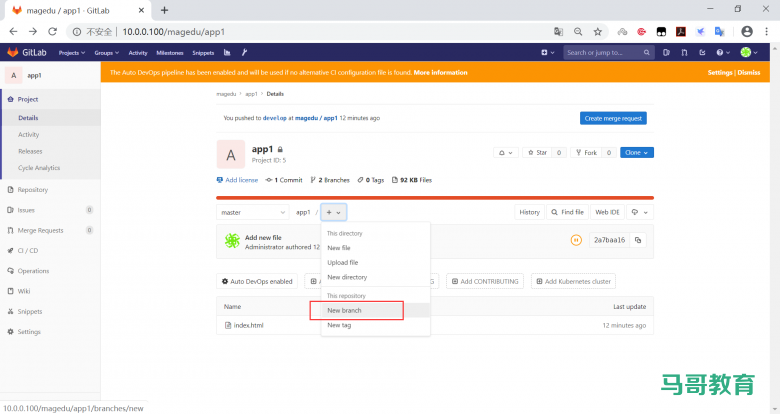
4.4.2 gitlab定义分支名称并创建

Jenkins安装插件
系统管理-管理插件-可选插件-Gitlab Hook和Gitlab Authentication
注意事项:
https://jenkins.io/security/advisory/2018-05-09/#SECURITY-263
1、在 jenkins 系统管理–全局安全设置,认证改为登录用户可以做任何事情
2、取消跨站请求伪造保护
3、Gitlab Hook Plugin以纯文本形式存储和显示GitLab API令牌
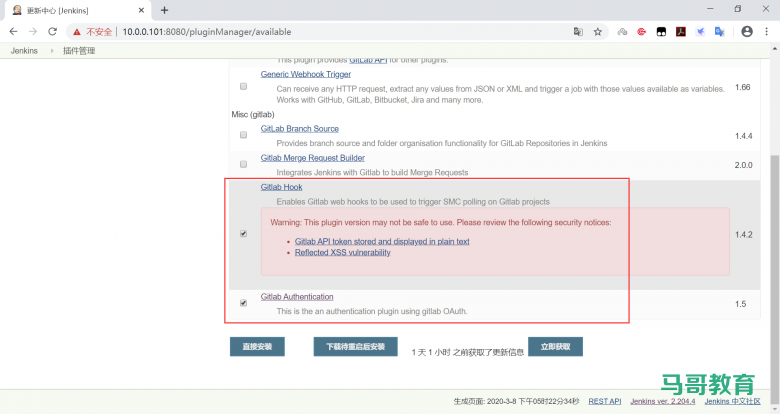
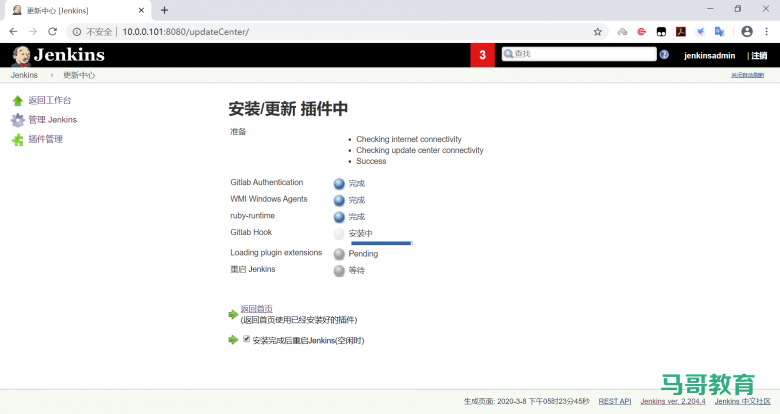
jenkins 修改登录认证方式和取消“防止跨站点请求伪造”
系统管理—全局安全设置
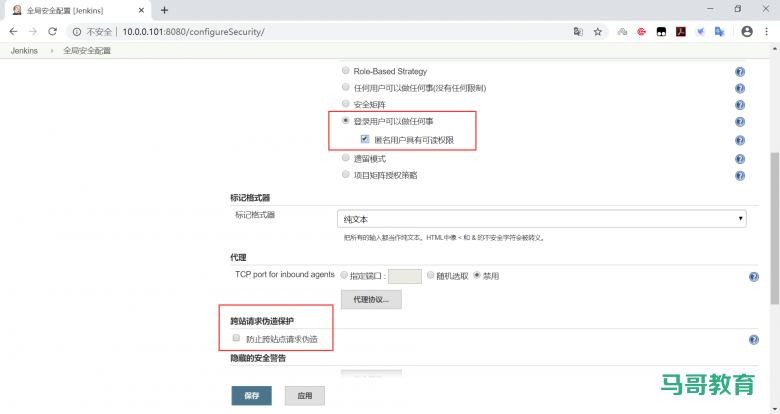
保存以上配置
jenkins新建develop job
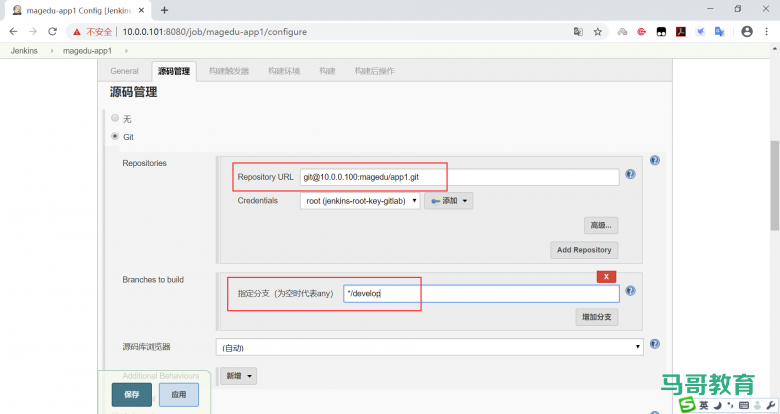
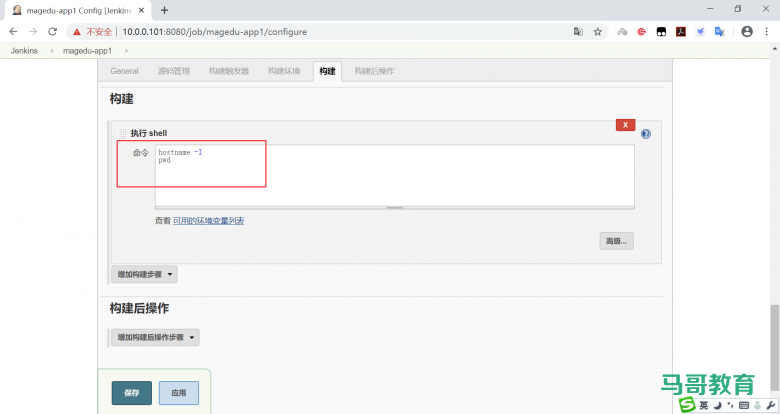
jenkins构建shell命令
构建命令为简单的测试命令,比如输出当前的账户信息:
jenkins配置构建触发器
生成 token 认证
[root@jenkins-ubuntu ~]#openssl rand -hex 12
655011b8326d3e1cbe05a4bc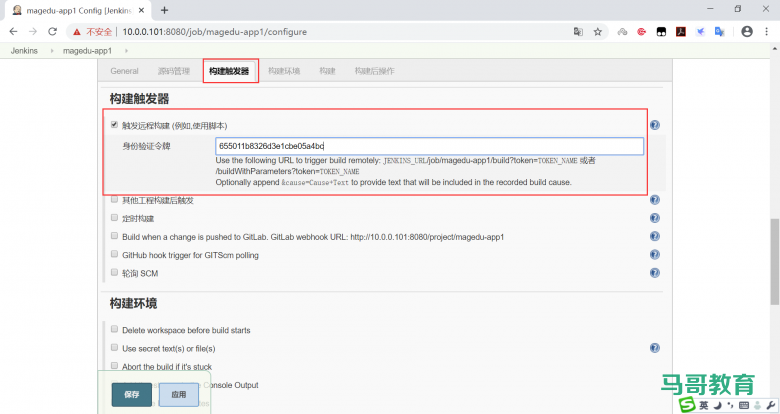
jenkins验证分支job配置文件
[root@jenkins-ubuntu ~]#tail   /var/lib/jenkins/jobs/magedu-app1/config.xml
  <builders>
    <hudson.tasks.Shell>
      <command>hostname -I
pwd
</command>
    </hudson.tasks.Shell>
  </builders>
  <publishers/>
  <buildWrappers/>
</project>[root@jenkins-ubuntu ~]#
curl命令测试触发并验证远程触发构建
1、在任意主机使用浏览器直接访问URL地址
2、使用curl命令访问URL
[root@centos8 ~]# curl http://10.0.0.101:8080/job/magedu-app1/build?token=655011b8326d3e1cbe05a4bc jenkins验证job是否自动构建
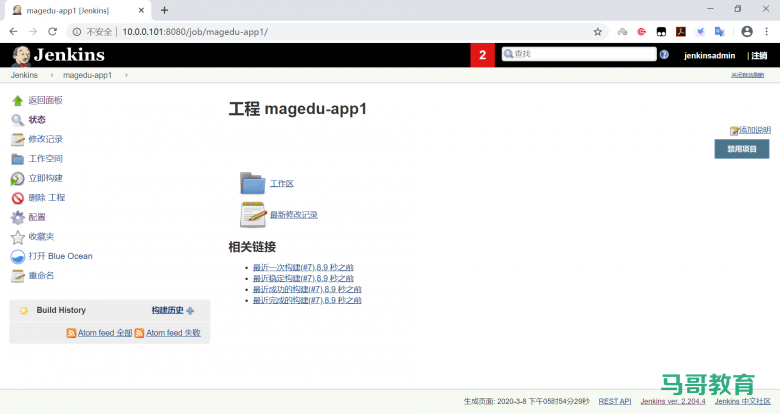
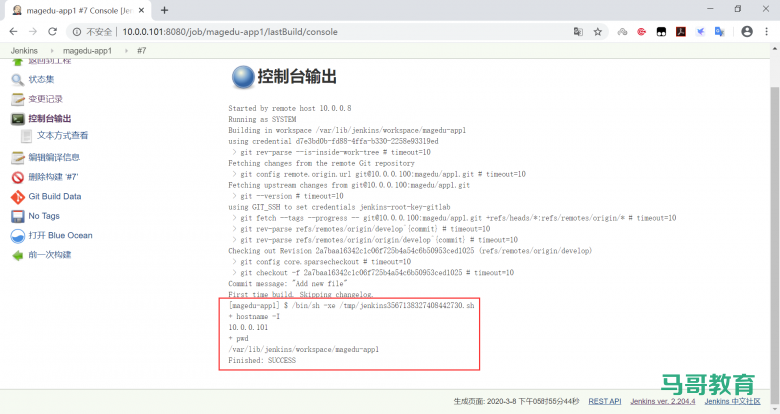
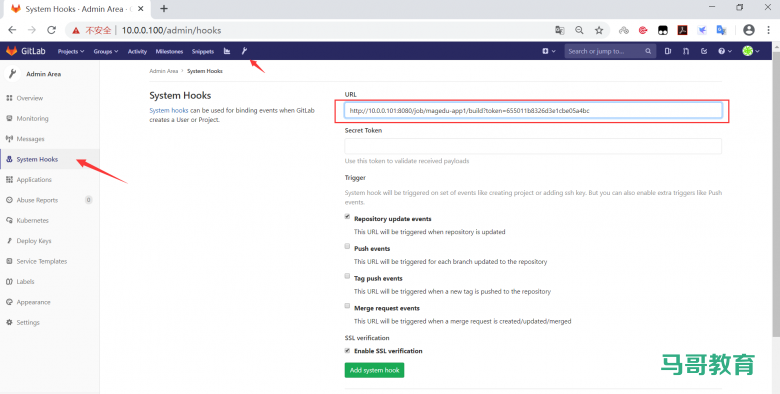
gitlab配置webhook
Admin area—System Hooks
测试钩子可用性
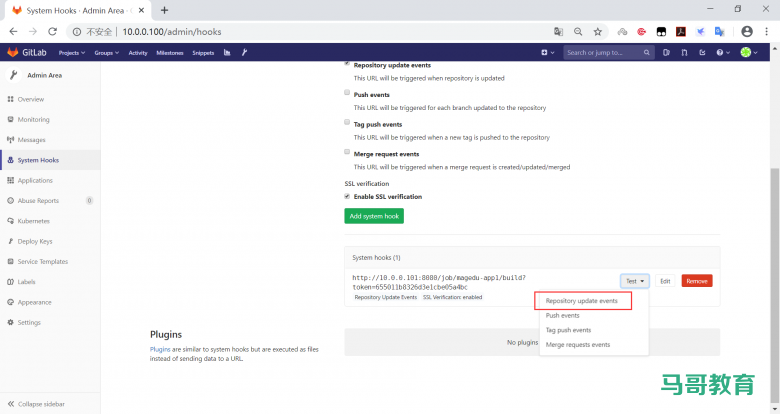
执行结果:

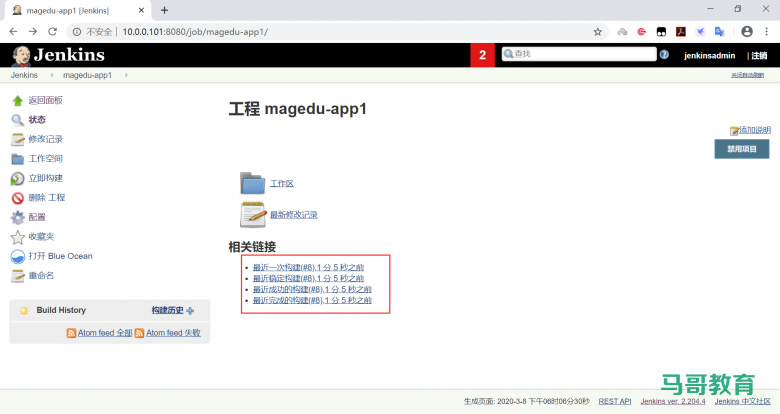
jenkins执行shell命令
将开发分支的执行shell命令更改为正式脚本:
cd /var/lib/jenkins/workspace/magedu-app1
tar czvf code.tar.gz *
scp code.tar.gz 10.0.0.103:/data/tomcat/tomcat_appdir/
scp code.tar.gz 10.0.0.104:/data/tomcat/tomcat_appdir/
ssh 10.0.0.103 "systemctl stop tomcat && rm -rf /data/tomcat/tomcat_webdir/myapp/* && cd /data/tomcat/tomcat_appdir && tar xf code.tar.gz -C /data/tomcat/tomcat_webdir/myapp/"
ssh 10.0.0.104 "systemctl stop tomcat && rm -rf /data/tomcat/tomcat_webdir/myapp/* && cd /data/tomcat/tomcat_appdir && tar xvf code.tar.gz -C /data/tomcat/tomcat_webdir/myapp/"

ssh 10.0.0.103 "systemctl start tomcat"
ssh 10.0.0.104 "systemctl start tomcat"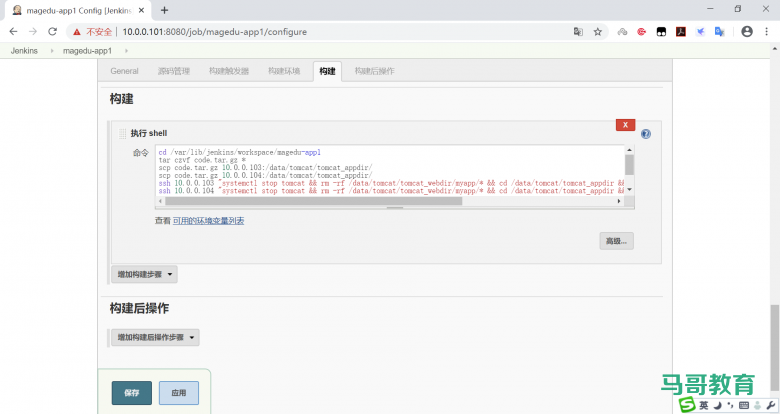
gitlab 开发分支develop测试提交代码
[root@centos8 ~]#git clone -b develop  http://10.0.0.100/magedu/app1.git
Cloning into 'app1'...
Username for 'http://10.0.0.100': wang
Password for 'http://wang@10.0.0.100':
remote: Enumerating objects: 3, done.
remote: Counting objects: 100% (3/3), done.
remote: Total 3 (delta 0), reused 0 (delta 0)
Unpacking objects: 100% (3/3), done.
[root@centos8 ~]#cd app1/
[root@centos8 app1]#ls
index.html
[root@centos8 app1]#vim index.html
[root@centos8 app1]#cat index.html
<h1>magedu/app1 v2 </h1>
[root@centos8 app1]#git add .
[root@centos8 app1]#git commit -m v2
[develop aa6eaf8] v2
 Committer: root <root@centos8.localdomain>
Your name and email address were configured automatically based
on your username and hostname. Please check that they are accurate.
You can suppress this message by setting them explicitly. Run the
following command and follow the instructions in your editor to edit
your configuration file:

    git config --global --edit

After doing this, you may fix the identity used for this commit with:

    git commit --amend --reset-author

 1 file changed, 1 insertion(+), 1 deletion(-)
[root@centos8 app1]#git push
Username for 'http://10.0.0.100': wang
Password for 'http://wang@10.0.0.100':
Enumerating objects: 5, done.
Counting objects: 100% (5/5), done.
Writing objects: 100% (3/3), 257 bytes | 257.00 KiB/s, done.
Total 3 (delta 0), reused 0 (delta 0)
remote:
remote: To create a merge request for develop, visit:
remote:   http://10.0.0.100/magedu/app1/merge_requests/new?merge_request%5Bsource_branch%5D=develop
remote:
To http://10.0.0.100/magedu/app1.git
   2a7baa1..aa6eaf8  develop -> develop
[root@centos8 app1]#
验证develop job自动构建是否成功
在 jenkins上验证任务执行成功
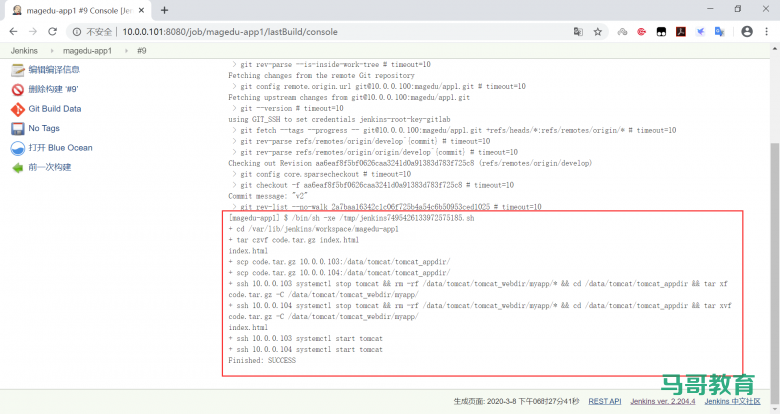
在后端服务器上验证结果


构建后项目关联
用于多个job相互关联,需要穿行执行多个job的场景。
配置构建后操作

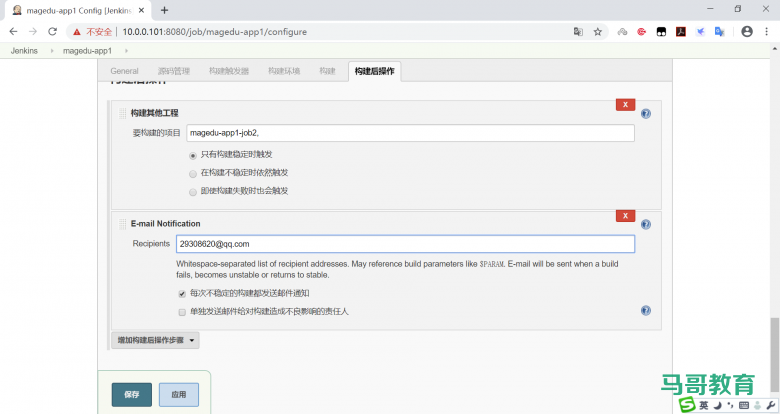
验证构建后操作
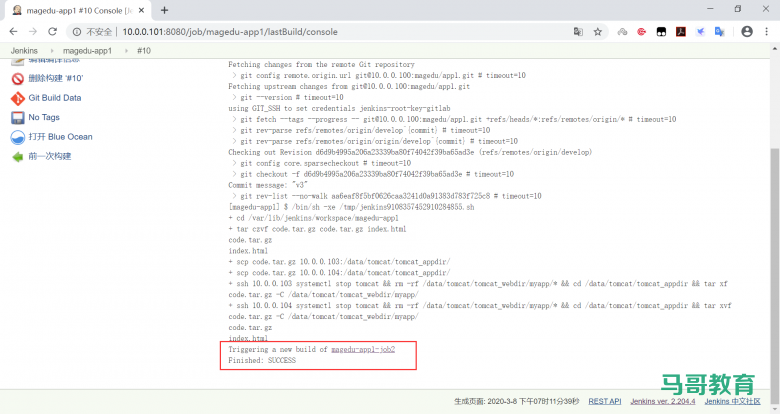
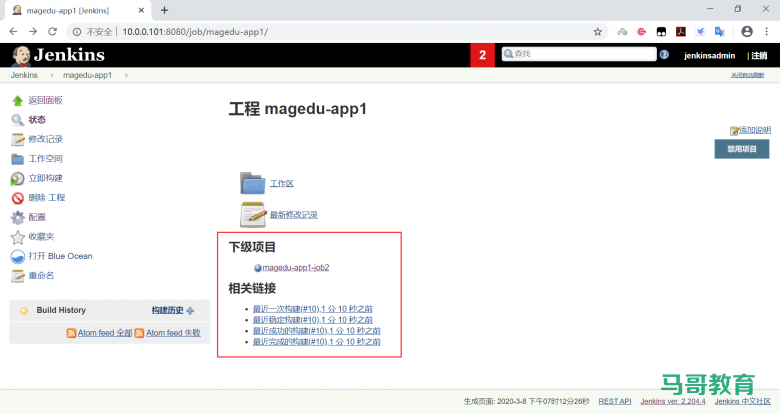
本文链接:https://www.yunweipai.com/35791.html




网友评论comments