Nginx+Keepalived高可用架构的3个隐藏坑位,90%的运维都踩过!
血泪教训!从生产事故中总结出的3个致命陷阱,看完让你少走3年弯路
前言:一次凌晨3点的生产事故
还记得那个让我印象深刻的深夜吗?凌晨3点,手机疯狂震动,监控告警如雪花般飞来——”服务不可用!用户无法访问!”作为运维工程师,这种场景你是否似曾相识?
当时我们的Nginx+Keepalived高可用架构突然失效,主备节点同时出现问题,导致整个业务系统瘫痪。经过通宵达旦的排查,我发现了3个隐藏极深的坑位,这些问题在测试环境中很难复现,却在生产环境中给我们造成了巨大损失。
今天,我将毫无保留地分享这些”血泪教训”,希望能帮助更多运维同行避免踩坑。
坑位一:脑裂问题的隐形杀手 – 网络分区导致的双主灾难
问题描述
很多运维同学都知道要防止脑裂,但大多数人只考虑了心跳检测失败的情况,却忽略了网络分区导致的更隐蔽的双主问题。
真实案例
# 看似正常的配置
vrrp_instance VI_1 {
    state MASTER
    interface eth0
    virtual_router_id 51
    priority 100
    advert_int 1
    authentication {
        auth_type PASS
        auth_pass 1111
    }
    virtual_ipaddress {
        192.168.1.100
    }
}
这个配置在单网卡环境下看起来完美,但当服务器有多网卡,或者处于复杂网络环境时,就可能出现致命问题。
踩坑现场
某天晚上,核心交换机的一个端口出现间歇性故障,导致主备节点间的心跳时断时续。结果:
- • 主节点认为备节点已死,继续持有VIP
- • 备节点认为主节点已死,也抢占了VIP
- • 网络中出现了两个相同的VIP!
客户端请求随机分配到两台机器,导致会话不一致、数据不同步等严重问题。
完美解决方案
# 防脑裂的完整配置
vrrp_instance VI_1 {
    state BACKUP  # 注意:两台机器都设置为BACKUP
    interface eth0
    virtual_router_id 51
    priority 100  # 主节点设置为100,备节点设置为90
    advert_int 1
    nopreempt     # 关键:禁用抢占模式

    authentication {
        auth_type PASS
        auth_pass your_complex_password_here
    }

    # 多重检测机制
    track_script {
        chk_nginx
        chk_network
    }

    # 脑裂检测脚本
    notify_master "/etc/keepalived/scripts/check_split_brain.sh"

    virtual_ipaddress {
        192.168.1.100
    }
}

# 关键的检测脚本
vrrp_script chk_nginx {
    script "/etc/keepalived/scripts/check_nginx.sh"
    interval 2
    weight -2
    fall 3
    rise 2
}

vrrp_script chk_network {
    script "/etc/keepalived/scripts/check_network.sh"
    interval 5
    weight -2
    fall 2
    rise 1
}
防脑裂检测脚本 (check_split_brain.sh):
#!/bin/bash
# 脑裂检测脚本
REMOTE_IP="192.168.1.11"# 对端IP
VIP="192.168.1.100"

# 检查对端是否也持有VIP
ping -c 1 -W 1 $REMOTE_IP >/dev/null 2>&1
if [ $? -eq 0 ]; then
    # 对端可达,检查是否也绑定了VIP
    ssh -o ConnectTimeout=2 -o StrictHostKeyChecking=no $REMOTE_IP \
        "ip addr show | grep $VIP" >/dev/null 2>&1

    if [ $? -eq 0 ]; then
        # 发现脑裂!立即释放VIP并告警
        logger "CRITICAL: Split brain detected! Releasing VIP..."
        ip addr del $VIP/24 dev eth0
        # 发送告警通知
        curl -X POST "your_alert_webhook" -d "Split brain detected on $(hostname)"
        exit 1
    fi
fi
坑位二:健康检查的致命缺陷 – 僵尸进程陷阱
问题描述
90%的运维同学的健康检查脚本都有一个致命缺陷:只检查进程是否存在,不检查服务是否真正可用。
典型的错误检查脚本
# 错误示例 - 大多数人都这么写
#!/bin/bash
ps -ef | grep nginx | grep -v grep
if [ $? -ne 0 ]; then
    exit 1
fi
这个脚本的问题是:即使nginx进程存在,也可能无法正常处理请求(端口被占用、配置错误、内存不足等)。
真实事故回放
某次生产环境中,nginx的worker进程因为内存泄漏变成了僵尸进程,master进程还在,但已经无法处理任何请求。我们的健康检查脚本依然返回正常,keepalived没有进行故障转移,结果用户访问全部失败!
完美的健康检查方案
#!/bin/bash
# 完美的nginx健康检查脚本
NGINX_PID=$(ps -ef | grep "nginx: master" | grep -v grep | awk '{print $2}')
VIP="192.168.1.100"
CHECK_URL="http://127.0.0.1/health"

# 1. 检查进程是否存在
if [ -z "$NGINX_PID" ]; then
    logger "Nginx master process not found"
    exit 1
fi

# 2. 检查端口是否监听
netstat -tlnp | grep ":80 " | grep nginx >/dev/null 2>&1
if [ $? -ne 0 ]; then
    logger "Nginx port 80 not listening"
    exit 1
fi

# 3. 检查配置文件语法
nginx -t >/dev/null 2>&1
if [ $? -ne 0 ]; then
    logger "Nginx configuration syntax error"
    exit 1
fi

# 4. 真实HTTP请求检查(关键)
HTTP_CODE=$(curl -s -o /dev/null -w "%{http_code}" --connect-timeout 2 --max-time 5 $CHECK_URL)
if [ "$HTTP_CODE" != "200" ]; then
    logger "Nginx health check failed, HTTP code: $HTTP_CODE"
    # 尝试重启nginx
    systemctl restart nginx
    sleep 2
    # 再次检查
    HTTP_CODE=$(curl -s -o /dev/null -w "%{http_code}" --connect-timeout 2 --max-time 5 $CHECK_URL)
    if [ "$HTTP_CODE" != "200" ]; then
        logger "Nginx restart failed, triggering failover"
        exit 1
    fi
fi

# 5. 检查系统资源
LOAD=$(uptime | awk -F'load average:''{print $2}' | awk '{print $1}' | sed 's/,//')
if (( $(echo "$LOAD > 10" | bc -l) )); then
    logger "System load too high: $LOAD"
    exit 1
fi

# 6. 检查内存使用
MEM_USAGE=$(free | grep Mem | awk '{printf("%.2f", $3/$2 * 100.0)}')
if (( $(echo "$MEM_USAGE > 90" | bc -l) )); then
    logger "Memory usage too high: $MEM_USAGE%"
    exit 1
fi

logger "Nginx health check passed"
exit 0
配套的nginx健康检查接口:
# 在nginx配置中添加健康检查接口
location /health {
    access_logoff;
    return200"healthy\n";
    add_header Content-Type text/plain;
}

# 更完善的健康检查接口
location /health/detailed {
    access_logoff;
    content_by_lua_block {
        local json = require "cjson"
        local health_data = {
            status = "healthy",
            timestamp = ngx.time(),
            connections = {
                active = ngx.var.connections_active,
                reading = ngx.var.connections_reading,
                writing = ngx.var.connections_writing,
                waiting = ngx.var.connections_waiting
            }
        }
        ngx.say(json.encode(health_data))
    }
}
坑位三:配置文件同步的时序陷阱 – 服务重启的多米诺骨牌
问题描述
这是最隐蔽也最危险的坑:当需要更新nginx配置时,如果两台服务器的重启时序不当,会导致服务完全不可用。
事故现场重现
某次我们需要更新nginx配置添加新的upstream,操作流程是:
- 1. 更新主节点配置,重启nginx
- 2. 更新备节点配置,重启nginx
看起来很合理对不对?但是魔鬼在细节中!
当主节点nginx重启时,keepalived的健康检查检测到nginx不可用,立即将VIP切换到备节点。但此时备节点还是旧配置,新的upstream根本不存在!结果是用户请求到了备节点,但backup server返回500错误。
完美的配置更新方案
#!/bin/bash
# 安全的配置更新脚本 - update_nginx_config.sh

MASTER_IP="192.168.1.10"
BACKUP_IP="192.168.1.11"
CONFIG_FILE="/etc/nginx/nginx.conf"
VIP="192.168.1.100"

# 当前是否为主节点
is_master() {
    ip addr show | grep $VIP >/dev/null 2>&1
    return $?
}

# 配置文件同步
sync_config() {
    local target_ip=$1
    echo"Syncing config to $target_ip..."
    scp $CONFIG_FILE root@$target_ip:$CONFIG_FILE

    # 验证配置文件语法
    ssh root@$target_ip"nginx -t"
    if [ $? -ne 0 ]; then
        echo"Configuration syntax error on $target_ip"
        return 1
    fi
    return 0
}

# 安全重启nginx
safe_restart_nginx() {
    local is_current_master
    is_master
    is_current_master=$?

    if [ $is_current_master -eq 0 ]; then
        echo"Current node is MASTER, performing graceful restart..."
        # 主节点:先降低优先级,让VIP切换到备节点
        echo"Decreasing VRRP priority..."
        sed -i 's/priority 100/priority 50/' /etc/keepalived/keepalived.conf
        systemctl reload keepalived

        # 等待VIP切换
        sleep 5

        # 验证VIP是否已切换
        for i in {1..10}; do
            is_master
            if [ $? -ne 0 ]; then
                echo"VIP switched successfully"
                break
            fi
            echo"Waiting for VIP switch... ($i/10)"
            sleep 2
        done

        # 重启nginx
        echo"Restarting nginx on former master..."
        systemctl restart nginx

        # 验证nginx启动成功
        if [ $? -eq 0 ] && curl -s http://127.0.0.1/health >/dev/null; then
            echo"Nginx restarted successfully"
            # 恢复优先级
            sed -i 's/priority 50/priority 100/' /etc/keepalived/keepalived.conf
            systemctl reload keepalived
        else
            echo"Nginx restart failed!"
            return 1
        fi
    else
        echo"Current node is BACKUP, restarting nginx directly..."
        systemctl restart nginx
        if [ $? -ne 0 ]; then
            echo"Nginx restart failed on backup!"
            return 1
        fi
    fi

    return 0
}

# 主流程
main() {
    echo"Starting safe nginx configuration update..."

    # 1. 检查当前状态
    is_master
    current_master=$?

    if [ $current_master -eq 0 ]; then
        echo"Running on MASTER node"
        other_node=$BACKUP_IP
    else
        echo"Running on BACKUP node"
        other_node=$MASTER_IP
    fi

    # 2. 先同步配置到对端
    echo"Step 1: Syncing configuration to peer node..."
    sync_config $other_node
    if [ $? -ne 0 ]; then
        echo"Configuration sync failed!"
        exit 1
    fi

    # 3. 先重启对端(备节点)
    echo"Step 2: Restarting nginx on peer node..."
    ssh root@$other_node"systemctl restart nginx"
    if [ $? -ne 0 ]; then
        echo"Failed to restart nginx on peer node!"
        exit 1
    fi

    # 验证对端服务正常
    sleep 2
    ssh root@$other_node"curl -s http://127.0.0.1/health" >/dev/null
    if [ $? -ne 0 ]; then
        echo"Peer node health check failed!"
        exit 1
    fi

    # 4. 重启当前节点
    echo"Step 3: Restarting nginx on current node..."
    safe_restart_nginx
    if [ $? -ne 0 ]; then
        echo"Failed to restart nginx on current node!"
        exit 1
    fi

    echo"Configuration update completed successfully!"

    # 5. 最终验证
    echo"Final verification..."
    curl -s http://$VIP/health
    if [ $? -eq 0 ]; then
        echo"✅ All services are healthy!"
    else
        echo"❌ Service verification failed!"
        exit 1
    fi
}

# 执行主流程
main "$@"
自动化部署钩子
为了进一步提升安全性,我们可以集成到CI/CD流程中:
# GitLab CI配置示例
deploy_nginx_config:
stage:deploy
script:
    -echo"Deploying nginx configuration..."
    -ansible-playbook-iinventory/productionnginx_update.yml
only:
    -master
when:manual# 手动触发,避免误操作

# Ansible playbook示例
-name:Updatenginxconfigurationsafely
hosts:nginx_servers
serial:1# 一台一台执行
tasks:
    -name:Backupcurrentconfiguration
      copy:
        src:/etc/nginx/nginx.conf
        dest:/etc/nginx/nginx.conf.backup.{{ansible_date_time.epoch}}
        remote_src:yes

    -name:Updateconfiguration
      template:
        src:nginx.conf.j2
        dest:/etc/nginx/nginx.conf
        backup:yes
      notify:restartnginxsafely

handlers:
    -name:restartnginxsafely
      script: /usr/local/bin/safe_restart_nginx.sh
总结:从踩坑到避坑的运维进阶之路
经过这些年的摸爬滚打,我深刻体会到:细节决定成败,预防胜于治疗。
核心要点回顾
- 1. 脑裂防护:多重检测 + 智能切换 + 实时监控
- 2. 健康检查:真实服务验证 + 系统资源监控 + 自动修复
- 3. 配置同步:安全时序 + 优雅切换 + 自动回滚
最佳实践建议
- • 监控告警:不只监控服务状态,更要监控切换行为
- • 文档记录:每次故障都要详细记录,形成知识库
- • 定期演练:至少每月进行一次故障切换演练
- • 自动化工具:将运维经验沉淀为自动化脚本
写在最后
作为运维工程师,我们是系统稳定性的最后一道防线。每一个看似微小的配置细节,都可能在关键时刻决定整个系统的生死。希望这篇文章能帮助更多同行少踩坑,多成长。
如果这篇文章对你有帮助,欢迎点赞收藏。如果你也有类似的踩坑经历,欢迎在评论区分享,让我们一起进步!
文末福利
就目前来说,传统运维冲击年薪30W+的转型方向就是SRE&DevOps岗位。
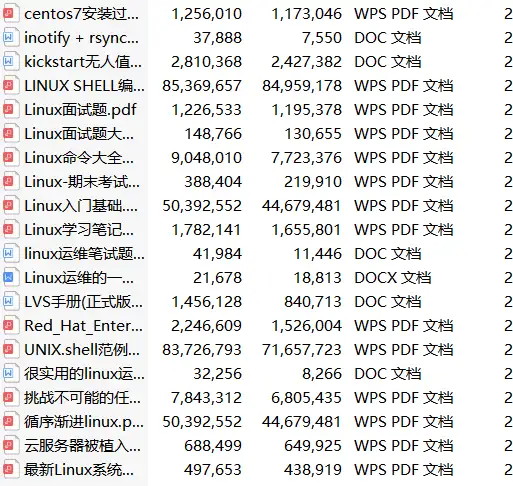
为了帮助大家早日摆脱繁琐的基层运维工作,给大家整理了一套高级运维工程师必备技能资料包,内容有多详实丰富看下图!
共有 20 个模块

1.38张最全工程师技能图谱

2.面试大礼包

3.Linux书籍

4.go书籍

······
6.自动化运维工具

18.消息队列合集


以上所有资料获取请扫码
备注:最新运维资料

100%免费领取
(后台不再回复,扫码一键领取)
本文链接:https://www.yunweipai.com/47350.html


网友评论comments